mitmrouter SSH Remote Packet Capture with Wireshark
This post will go over how to set up remote packet capture using Wireshark over SSH.
Prerequisites:
- tcpdump installed on the mitmrouter host
- sudo exception to run tcpdump on the mitmrouter host
- Wireshark installed on remote machine with sshdump selected for install during the installation process
- sshdump configured
Installing tcpdump is straightforward: Run sudo apt install tcpdump on the mitmrouter host
To add a sudo exception for tcpdump, we need to add a new line to the sudoers config file. To edit the file, use the command sudo visudo then add this line to the end of the file: mitmadmin ALL = NOPASSWD: /usr/bin/tcpdump A quick explanation of the entry:
mitmadmin- the username that gets the exemptionALL- applies to all hosts (in this case, just the mitmhost since it’s not a shared sudoers file)NOPASSWD- this entry only exempts the specific command that follows/usr/bin/tcpdump- the full path to the binary- You can find the path using
which tcpdump
- You can find the path using
The Wireshark installation is straightforward - just follow the installer prompts and make sure the sshdump option is selected
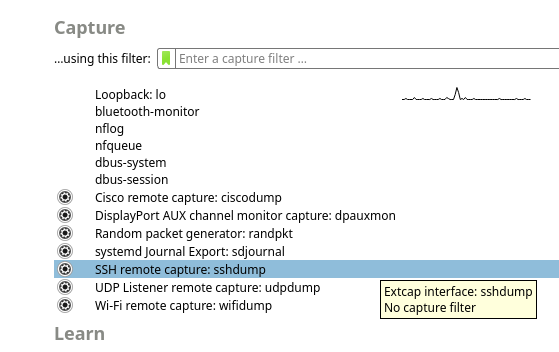
Once Wireshark is installed, scroll down in the interface list and click the settings wheel on the sshdump option (these screen shots were as of version 4.0.17 - the interface has changed slightly over the years, so they may not match up if they have reworked it in a later version):
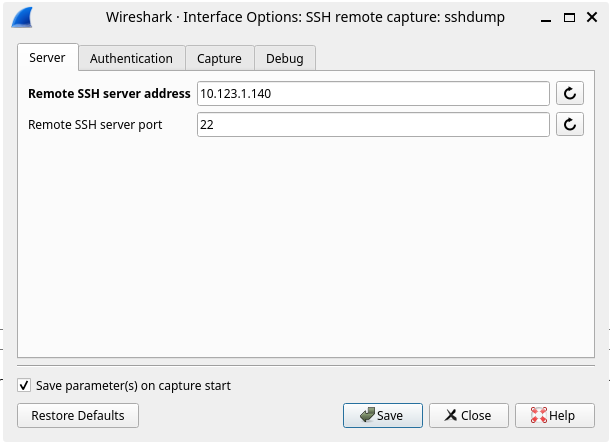
Under the Server tab, enter your mitmrouter host and ssh port. An FQDN can be used here if you have a DNS entry for it:
On the Authentication tab, enter your username and password on the mitmrouter host:

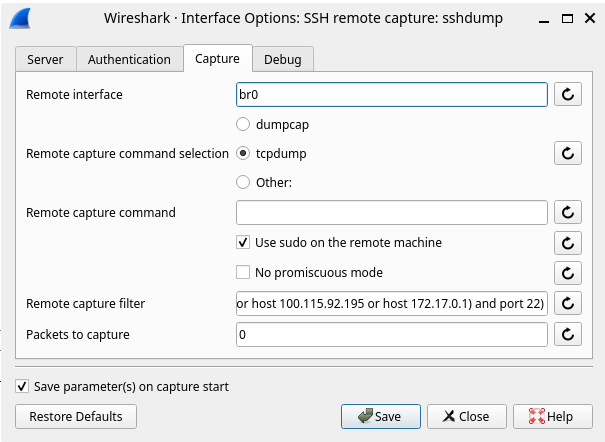
Finally, on the Capture tab enter the interface to capture from (br0), check Use sudo on the remote machine, and leave the filter as-is to avoid capturing packets between your remote client and the mitmrouter server:
Nothing on the Debug tab needs to be configured.
You can now see any cleartext requests being made from any client connected to the SSID configured in mitmrouter. The next post in the mitmrouter series will cover proxying TLS traffic for decryption.